


ZOOM Video Call – An Introduction
1) Download the Software
First of all, we recommend you to download and install the program for ZOOM on your computer or mobile phone. Although you may also use ZOOM directly in the web browser, the quality is not as good and the connection is more unstable.
The ZOOM software is available on Windows, macOS, and Linux operating systems, as well as in the form of a mobile „app“ for both Android and iOS.
You can download the client for both stationary PCs and laptops here: https://zoom.us/download. You will also find links to the app stores for Android and iOS.
Follow the installation instructions.
2) Account or no account?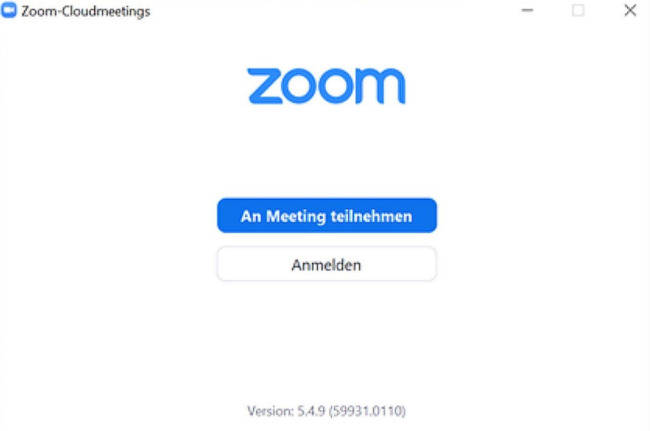
To join a ZOOM conference, you don’t need to register an account—you may participate with a simple „guest name“ („Join meeting“). As a guest, you do not need to provide an email address or password.
If you wish, you may register for an account. Then a profile picture will be displayed in the chat list. To create an account you need—as with most Internet applications—an e-mail address. After registering, you need to click the link sent to you in an e-mail. Write down your password. You will need it for every login.
3) Let’s go!
Access to a Zoom conference works via a link or a Meeting ID that you usually receive from the organizer a few days before the event / video call. You then have to agree to open the app and will be automatically redirected.
If the Zoom app does not open automatically when you click on the link, open it manually. You will then need to manually enter the Zoom video conference number (also called ‘Meeting ID’) into your app. You can do this by clicking on „Join Meeting“. You will receive the meeting ID from the organizer.

If you wish to invite another person to the video call in which you are already a participant, you will find the meeting ID in the upper left corner behind the icon with the green shield.
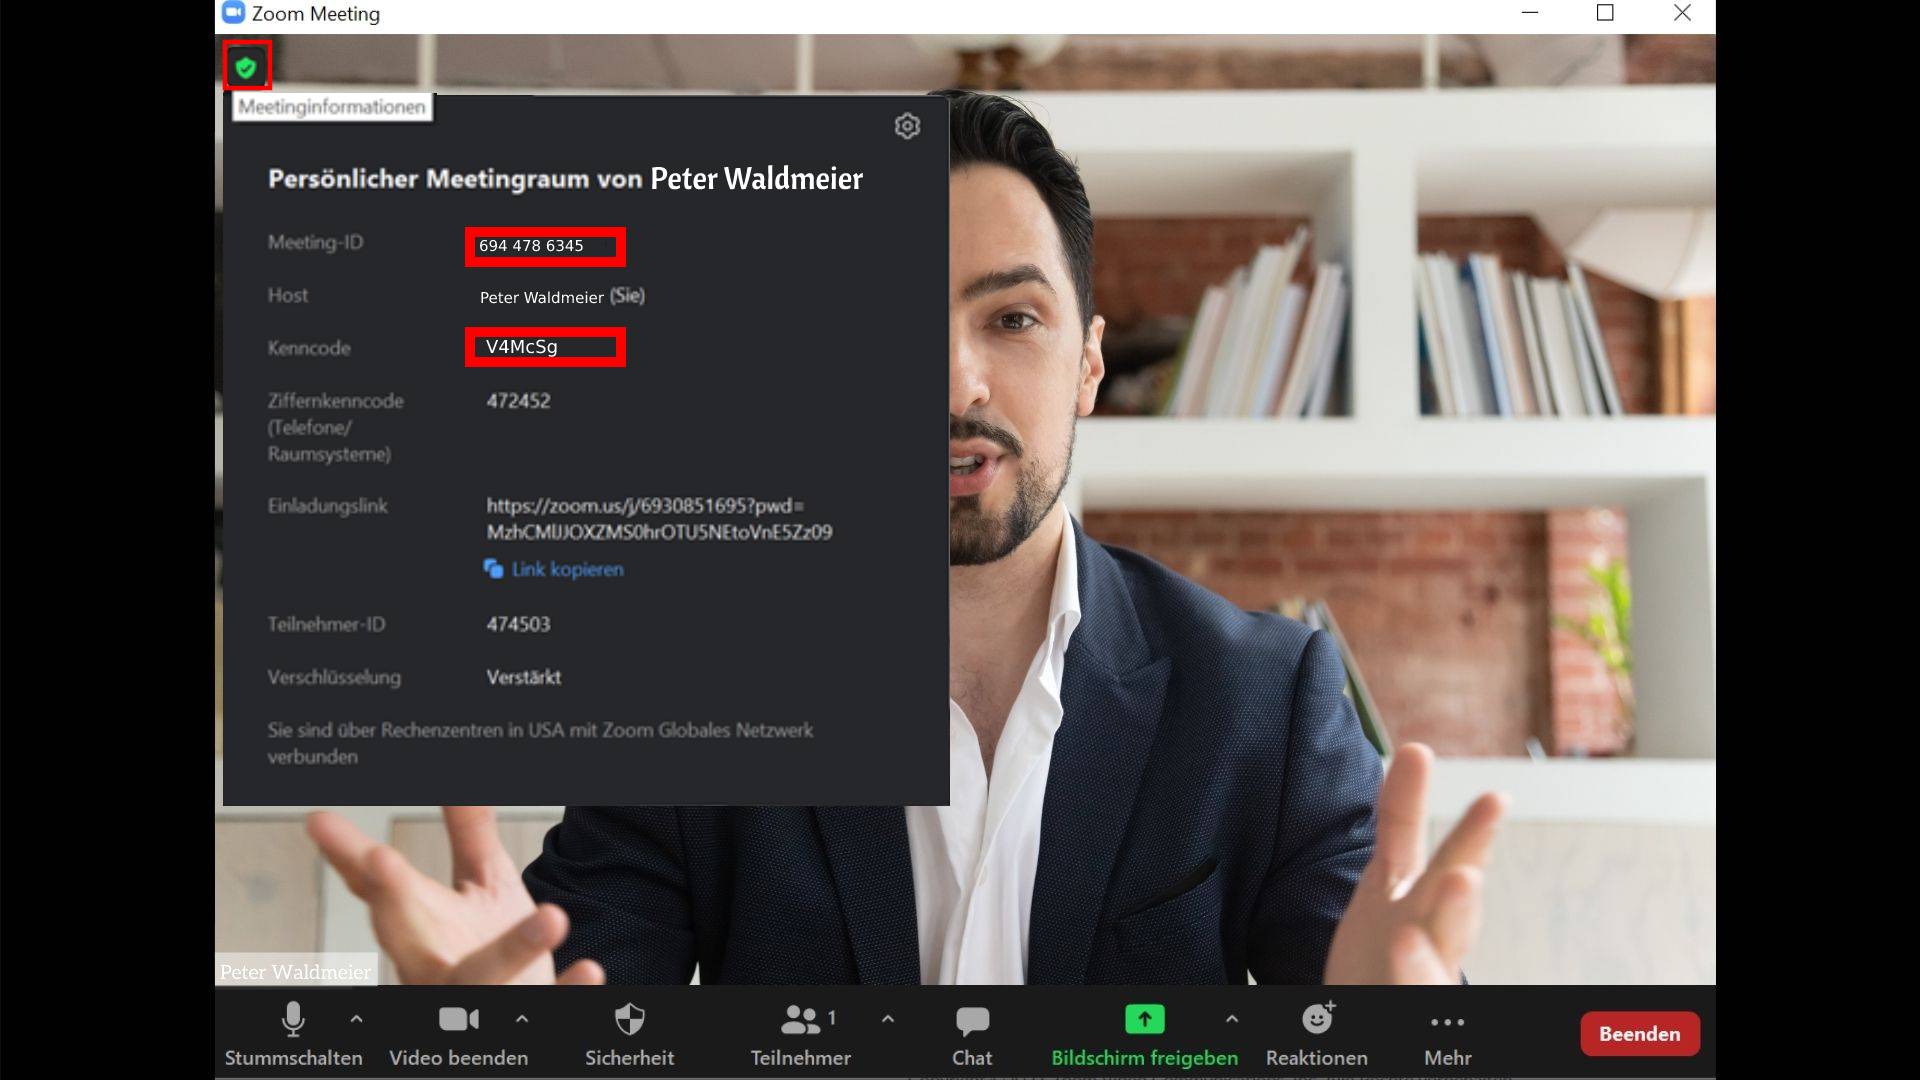
In addition, some Zoom conferences are protected by a password, which you will also receive via e-mail from the organizer.
When you dial into the videoconference, you will either be taken directly to the call or to a waiting room from which you will be let in by a moderator. Just wait. You do not have to do anything. The software notifies the moderator automatically.
4) Turning the microphone on and off:
In many Zoom conferences, the camera and microphone of the participating guests are initially switched off or muted.
As a general rule, only those who are actually speaking should switch on their microphone. The purpose of this is to avoid feedback and other sound interference.
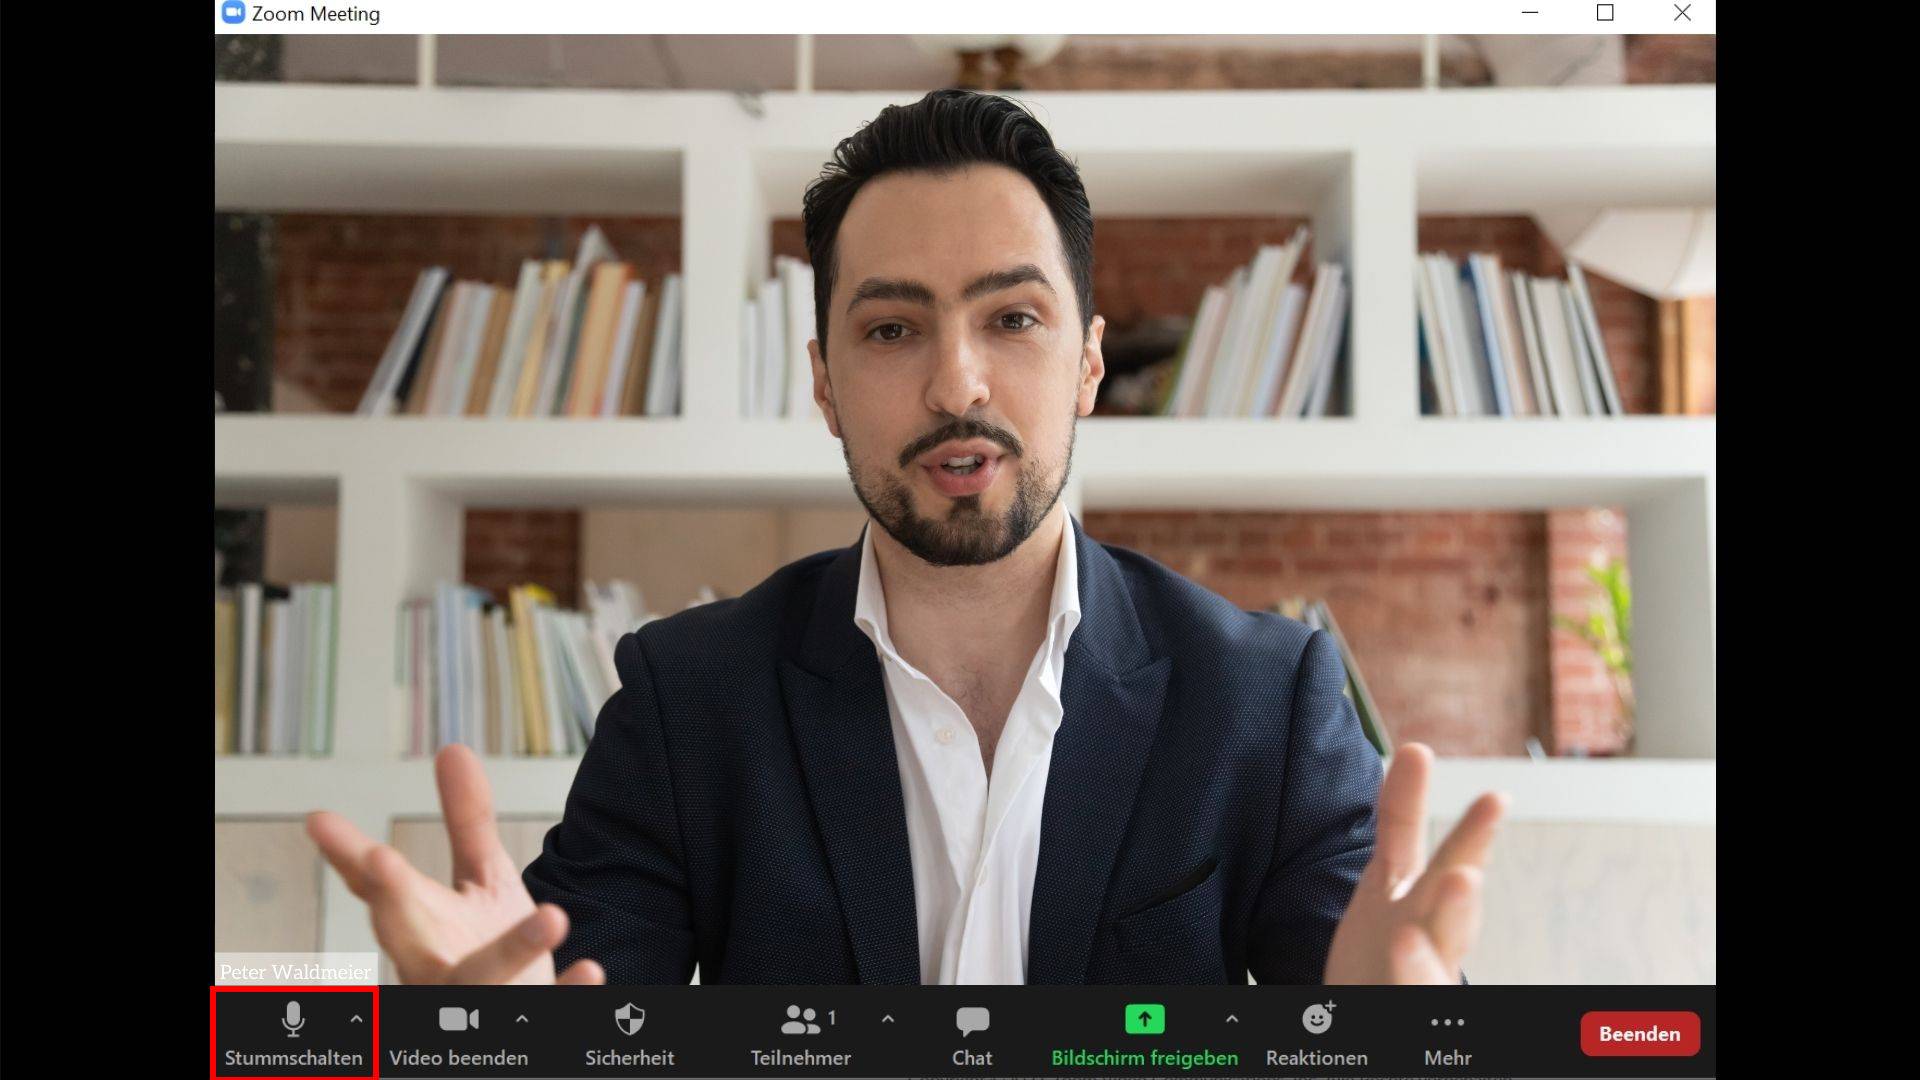
In short, you have to switch on your camera and microphone manually first. You can do this using the two buttons of the same name at the bottom left. If you don’t see them, move your mouse over the app briefly or click the app briefly.
We kindly ask you to always mute your own microphone again after your speech. Exceptions to this rule are one-on-one conversations or interviews where the conversation switches back and forth quickly. If you do not mute your microphone, the moderator will do so for you at some point. Please remember to turn it back on before your next speech.
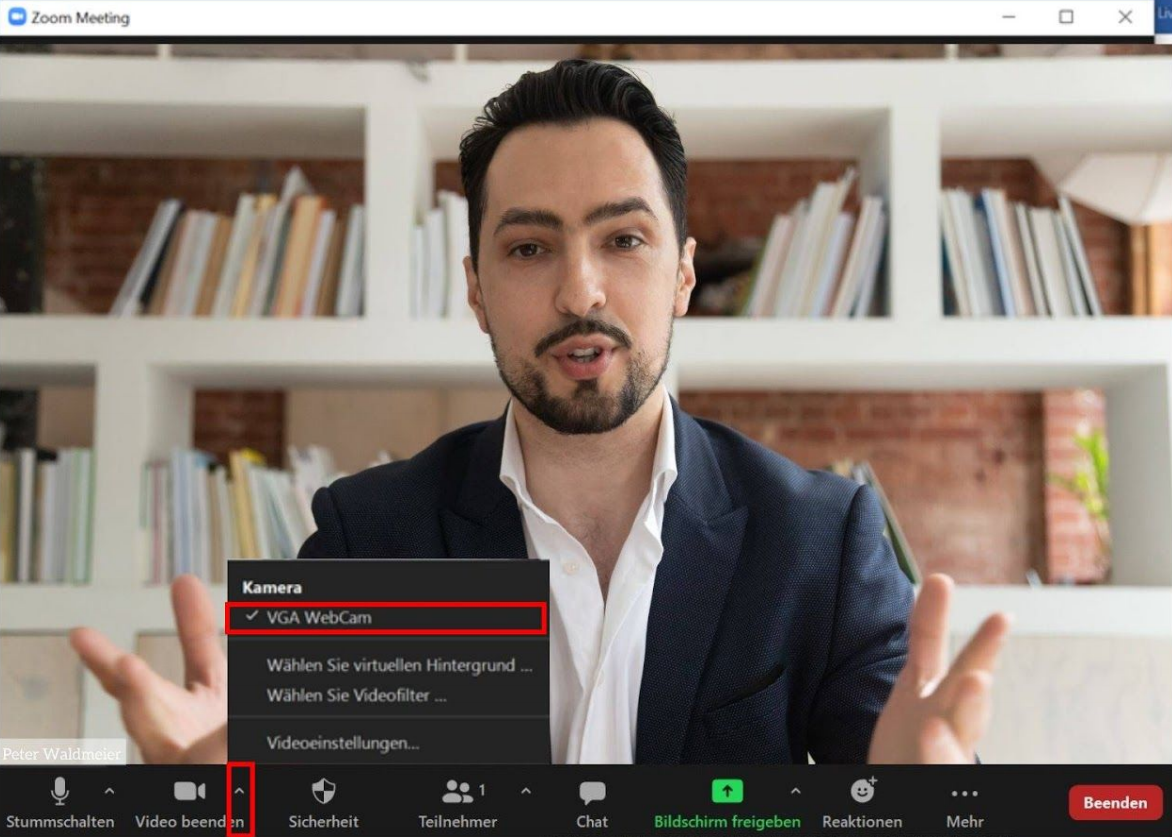
If you cannot be heard after switching on the microphone, you will find a small check mark on the video and audio button at the bottom left, which opens another menu. Here you can specifically switch audio and video devices.
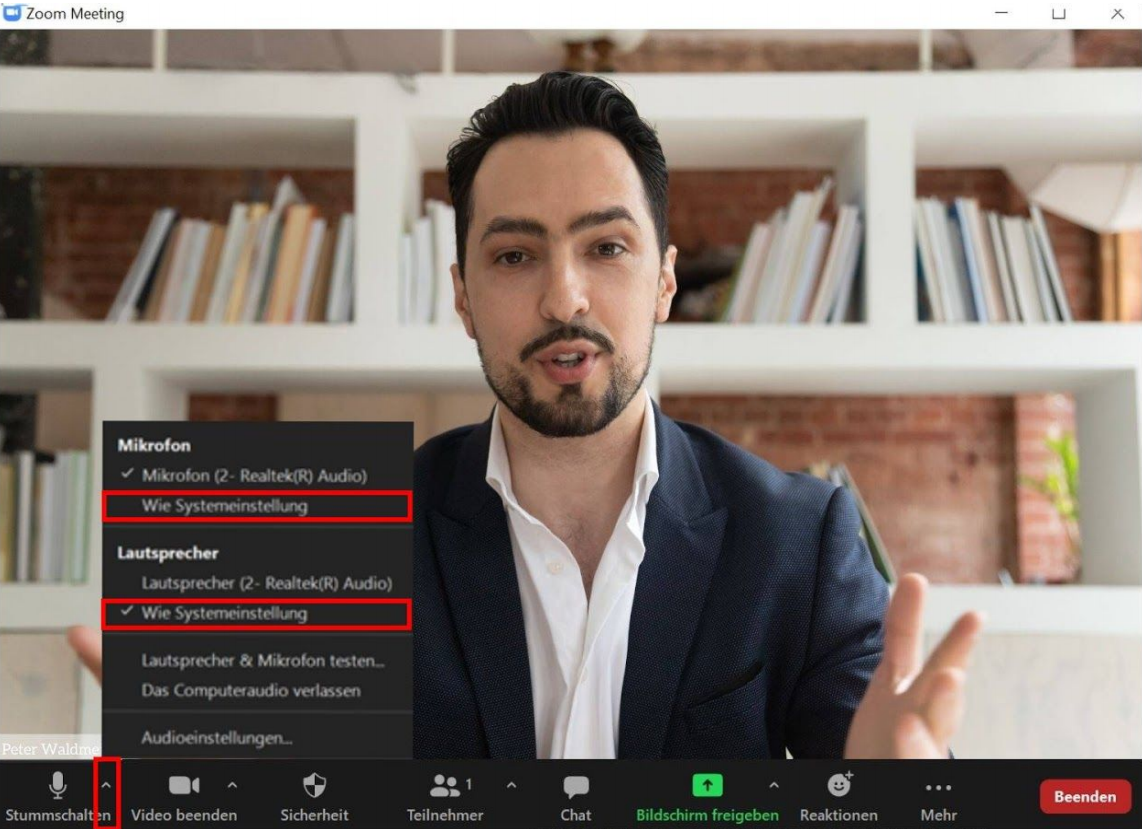
In the menu you can select the right microphone. Just try all the audio inputs. If none works, you can adjust further settings under „Audio settings“ (at the very bottom). Please test all of this before the event, preferably already in a ZOOM call, e.g. with a friend! During the event, it is difficult to assist you with this, because then everything takes place publicly in the video call.
In this menu, you can not just select which microphone (audio input) you would like to use, but also the audio output, for example a connected Bluetooth headset, speakers connected to the laptop, or internal speakers.
Generally, we recommend using a headset, as the voice quality is often better than built-in microphones and speakers in a typical laptop.
Also, make sure that only one device per room is on the call to avoid doubling of sounds and feedback.
5) Configuring and turning on the camera:
You can also switch on the camera via the button of the same name at the bottom left. If necessary, you can switch between different webcams via the small check mark next to it.
Regarding the video image, we strongly recommend that you always place a light source in front of you, i.e. towards your face, and avoid light sources behind you.
In addition, for live streams your head should not be cropped and there should be enough space at the bottom of the image for a possible name insertion (lower third).

6) Screen sharing for presentations:
In Zoom, you have the ability to share your screen to show content to other participants. A common use case for this is lectures with PowerPoint presentations (or any other presentation software). Instead of showing presentation slides to the room via a video projector („beamer“) as in an analog event, in a ZOOM conference you can share your screen where you have the presentation open. The slides will then appear in a large window on the screen and your video (of your face) will appear small next to it.
You can share your screen via the „Share screen“ button in the lower middle area:
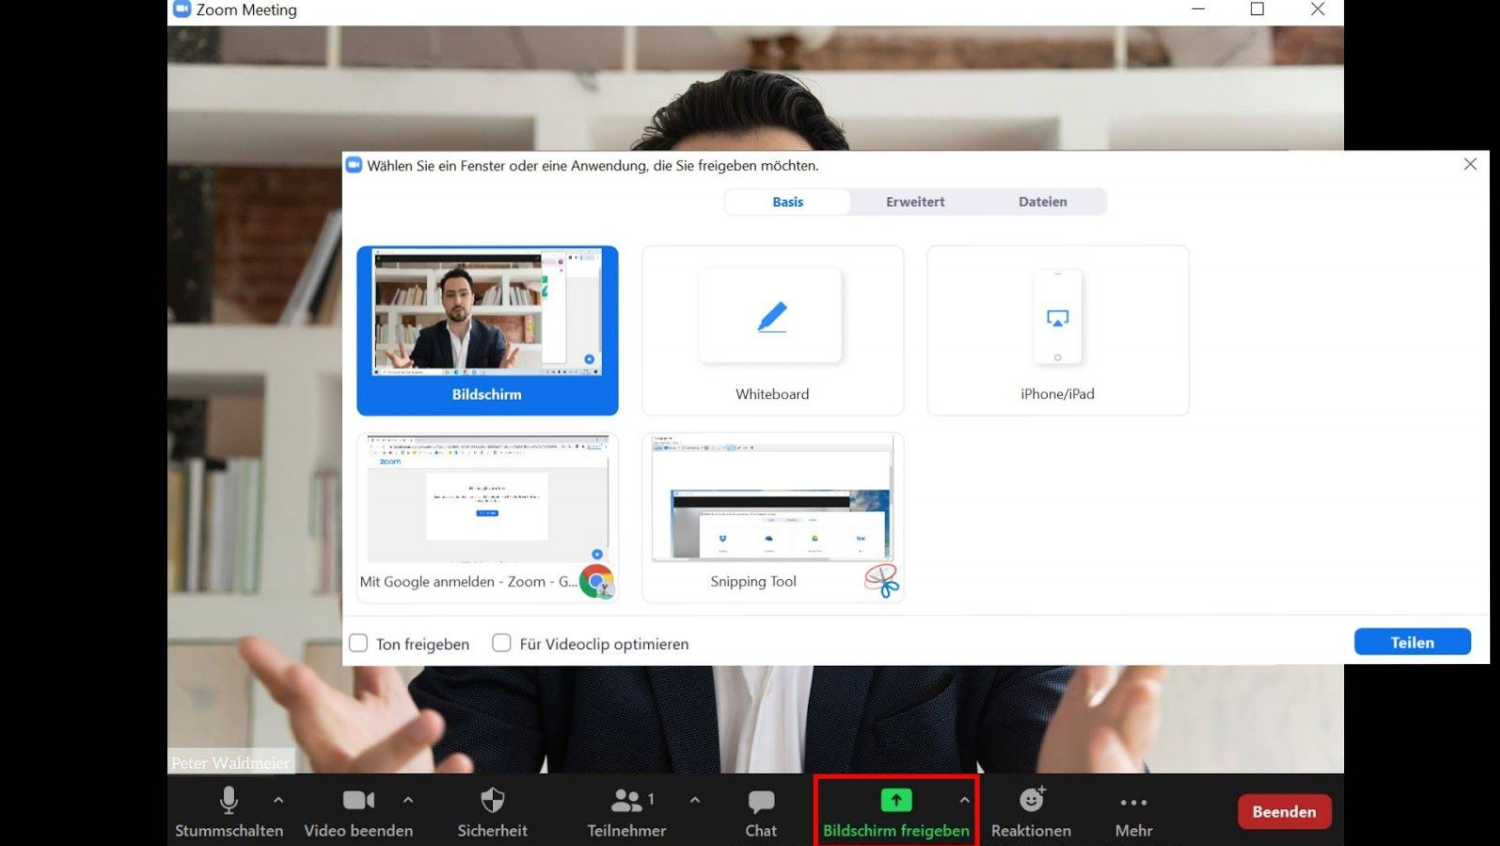
If you also want to transmit sound from your device (e.g. for a video in the presentation), you need to place an additional check mark in the same window at the bottom left under „Share sound„.
You can share your whole screen or only a specific program, e.g. PowerPoint. We recommend the latter. This way you can avoid that notifications from your operating system disturb your presentation.
Usually you have to share the program via ZOOM first and can only share the PowerPoint presentation as a second step. It is best to test this in advance in a separate video call with friends or colleagues!
Please note that you cannot see the chat in ZOOM during a presentation, since your presentation is in full screen. If it is important for you to see the chat, use two monitors or two laptops—one to show the presentation and a second laptop / monitor to follow the chat.
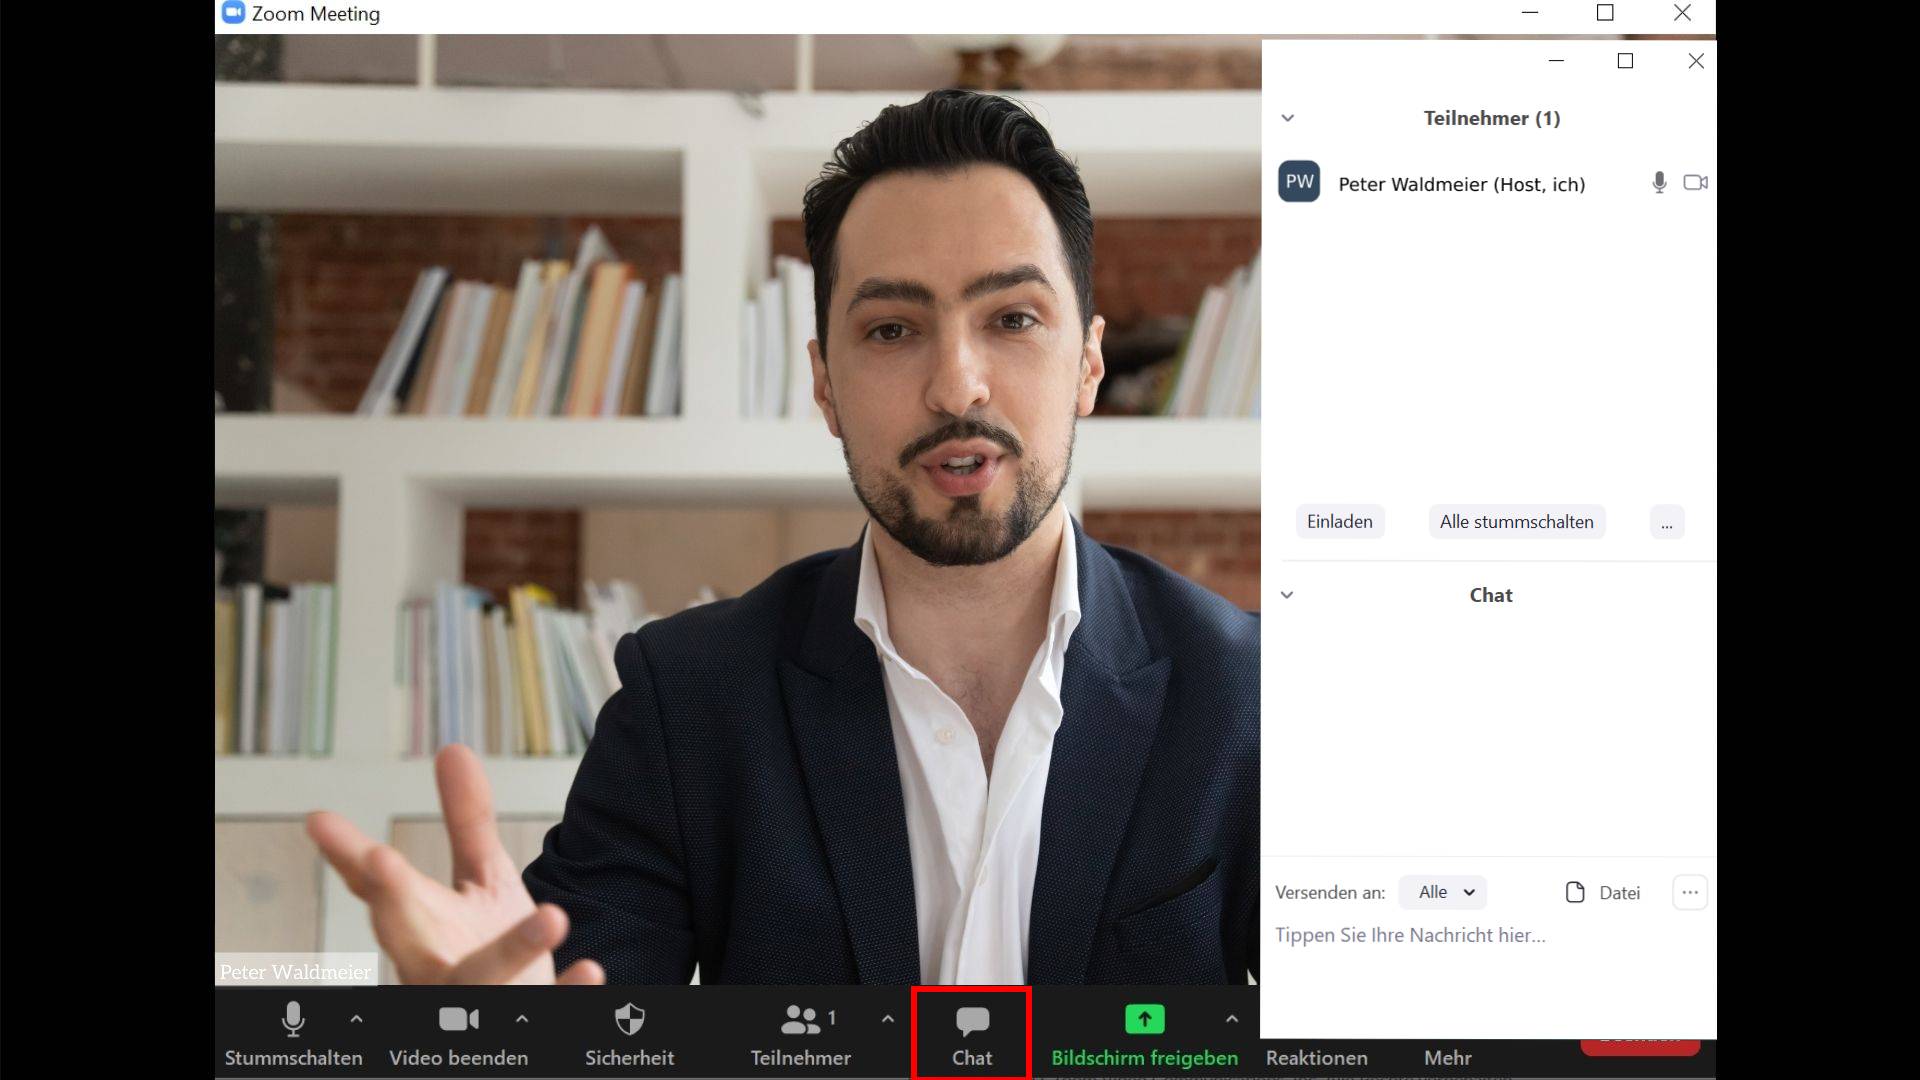
7) Using the chat:
During the course of roundtable discussions or presentations in a video conference, questions can often arise from the audience. Perhaps your event also has a section designated specifically for questions and answers.
If there are a large number of participants in the video conference, it quickly becomes confusing if everyone tries to speak into the microphone at the same time to ask their question. As a rule, the organizer will ask you to first announce your question via the chat function or to ask it in writing right there.
The zoom chat is displayed next to the video and can be shown and hidden via the „Chat“ button at the bottom of the screen. (If necessary, click on the program or move the mouse to see the symbol bar).
Many organizers will ask you to first make yourself known in writing via the chat, e.g. by saying „I would like to ask a question“. Wait until the moderator calls on you. Be ready, however, so that long waiting times are avoided when switching on the camera and microphone.
During some events, only written questions are possible. Type them in in their entirety and be sure to ask short, easy-to-understand questions. This will make it easier for the moderator to read out aloud your question.
In the lower third of the chat you will also see the „Send to“ option. Instead of „Everyone“ (default) you can also send your message as a private message (so called „DM“) to just a single person in the call.
Good luck!