


Instruction
1.) You must have at least the status “Editor” on the target FB page.
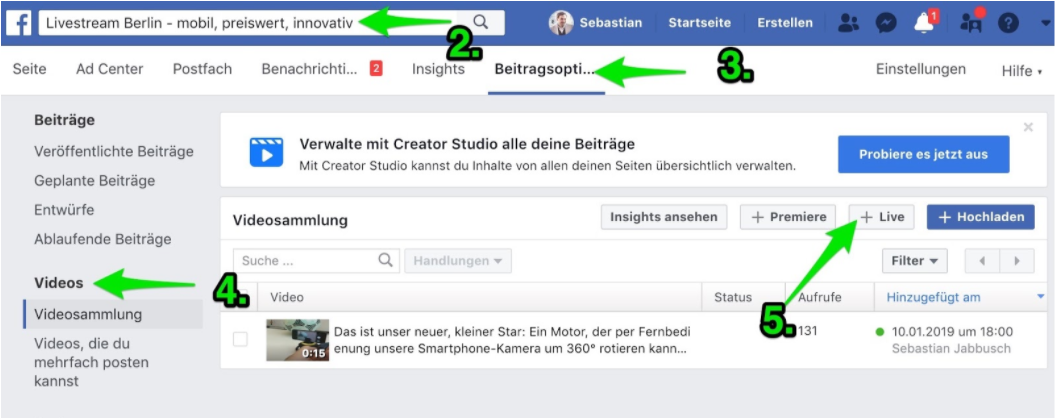
2.) Go to your Facebook page: www.facebook.com/NameOfYourSite
3.) Click on the “Contribution Options” tab at the top.
4.) Then click on the “Videos” section on the left.
5.) Now click again on the top center of the light gray field “Live”
6) A new window opens (see figure on next page). Now here you need to write the text of the live stream post on the right.
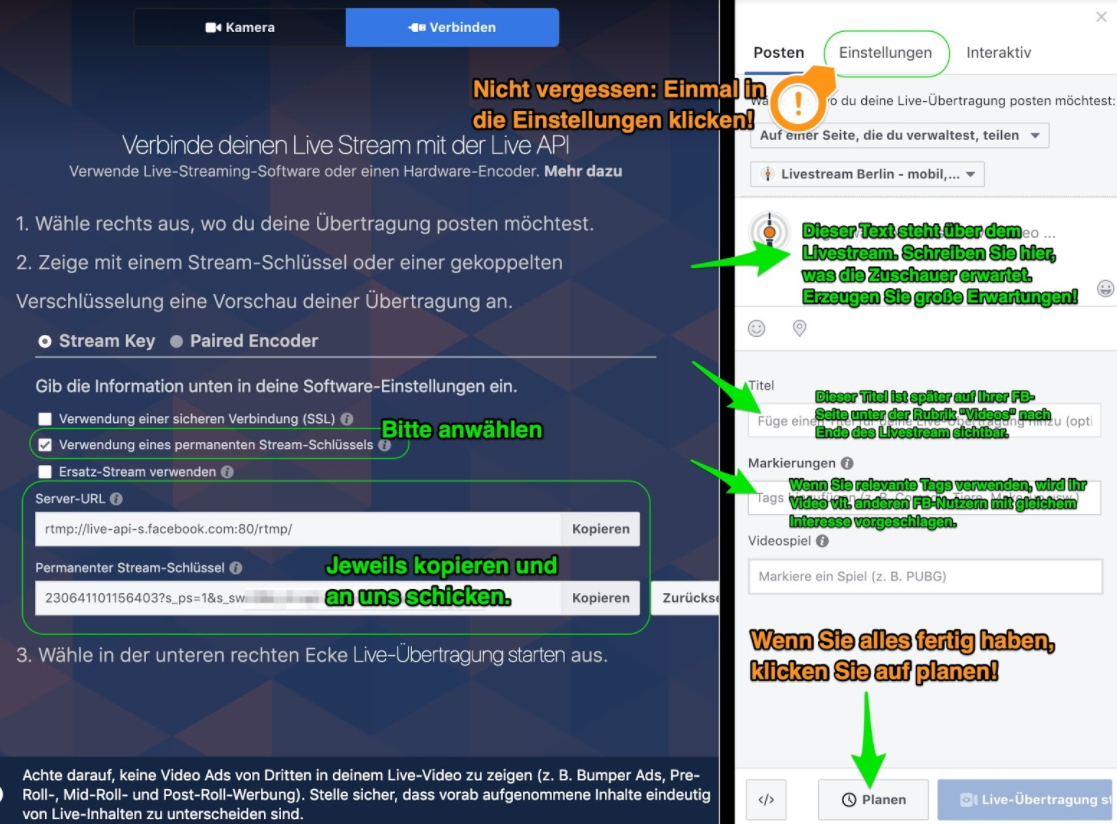
7.) Please set the stream key to “permanent” and copy it for us.
Please then send it to us by email (info@easylivestream.de) or Whatsapp (+49 176 20336676).
8) Before you schedule the post (bottom right), click on the “Settings” tab at the top. There please set the following:
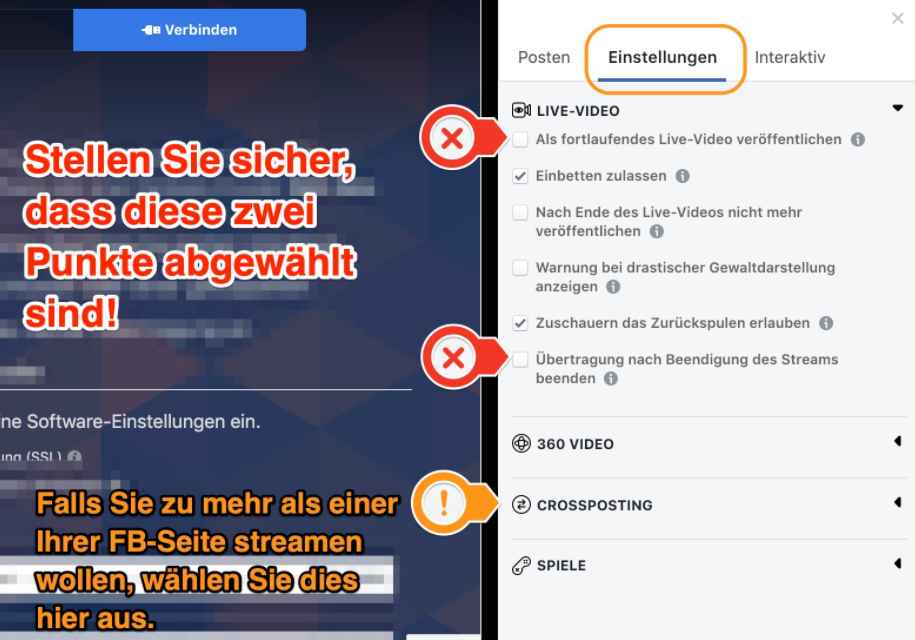
a) “Continuous live videos” are not stored on FB after the end of the live stream. We therefore recommend that you do not select this option.
b) If you uncheck “End broadcasts after stream ends”, the live stream will remain visible to viewers even if our connection to the Internet briefly drops. FB then briefly shows the viewer a “black screen”. As soon as we reconnect to the Internet, the image comes back. We recommend deselecting this setting, because it allows viewers to stay in the live stream even if there are internet connection problems. (Only disadvantage: You always have to manually stop the live stream on your FB page at the end of the event. So click on “Stop”. We will do this for you if you grant us the corresponding rights as editor on your page).
c) If you have multiple Facebook pages and want to show the stream on multiple FB pages at the same time, you can select that under “Crossposting”. The stream then appears identically as a native post on the other FB pages. However, you must have editor rights on all target pages where you want to crosspost the live stream.
9.) When you have set everything, return to the main tab and then click “Schedule”.
10.) The following pop-up window will now open:
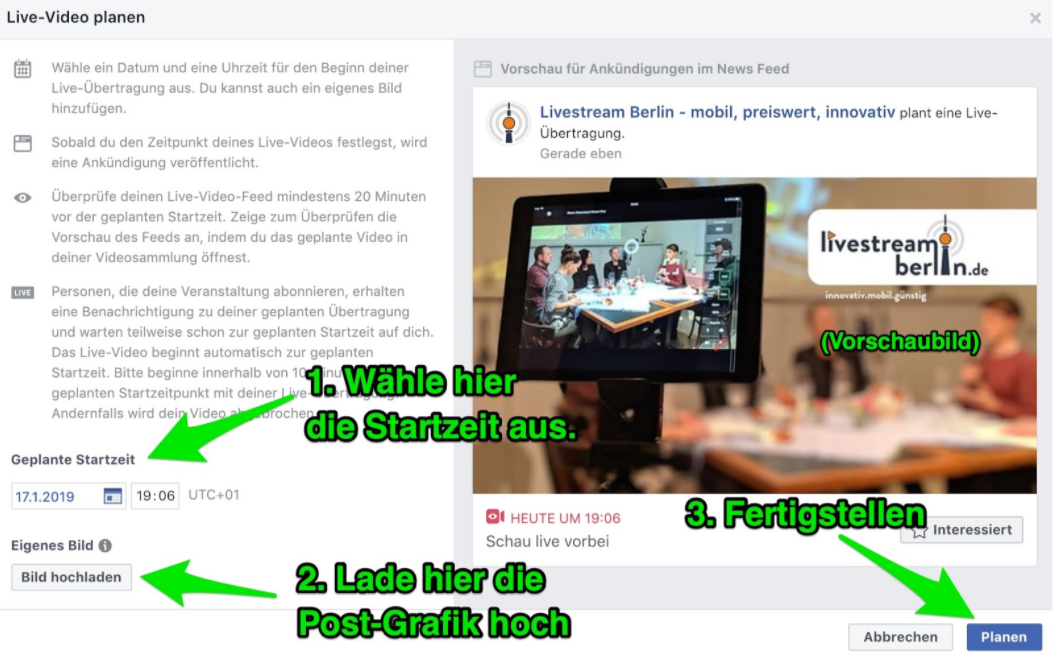
11) An ideal start time is about 10-15 min before the actual event. This will give you time to collect a few spectator:s. We usually show in the picture a graphic in which
we point out the start “in a few minutes”. (Tip: You should be present in the chat right from the start. Feel free to greet the first viewers personally and bridge the waiting time).
You can push back the scheduled start time until the start of the live stream, before the event. You can also use “manual start” to bring forward the start of the live stream at any time.
12) Be sure to upload an attractive thumbnail image. This decides whether the users are reminded of the event in advance. Avoid too much writing. We recommend a graphic with the dimensions of 1600 x 912 pixels.
13) You can plan the event maximum seven days into the future. We recommend posting the planned live stream about two to three days before the event.
At the start and during the live stream:
14.) You can change the text of the live stream post at any time. At the latest, you should do that at the start. For example, write “We will now show you…”
15) After the start of the live stream, you can promote the live stream through your FB Ads account.
16.) Answer questions in the chat. Kindly encourage viewers to share the post.
In the end:
17.) Manually turn off the stream on your FB page. To do so, click on the live stream in progress.
18) About five to ten minutes after the live stream ends, it should be automatically available as a video post on your site for re-watching.