


Videoconferencing: How we hear and see you best!
Instructions in 7 simple steps!
Duration: approx. 15 min
Step 1: The place
Find a quiet place in the apartment. Choose a plain background or one with a lot of spatial depth. Make sure that no intimate objects or secrets are visible in the background (calendars, passwords, etc.).
Ideally, the place has a lot of natural light – a large window is good for this. Make sure that the window is behind the computer.
The laptop camera should not be pointed to the window.
The room should not have an “echo” if possible. Avoid typical “conference rooms,” which are smooth, bare floors and walls. Carpets, sofas and bookshelves reduce the reverberation.
Step 2: The Internet
You need fast Internet. Ideally, you connect your laptop via network cable. If you don’t have a cable, here’s a tip: there’s often one in your router’s packaging. If you can’t buy one anymore and have to connect via WiFi, be sure to avoid thick walls between you and the nearest WiFi router.
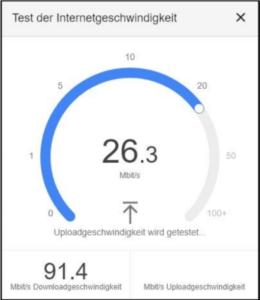
You should now test the speed of your Internet by typing “Speedtest” on Google and then clicking the blue “Perform” button. The second number, the so-called “upload”, is decisive. We recommend min. 5-7 Mbit/s. Repeat the test three times.
If you are below that most of the time, check if you can hold the video conference at another location, such as your office or a coworking space. An alternative can also be to open a WiFi hotspot on your cell phone and connect the PC to it. Place the phone near a window to improve LTE reception.
Attention: You need approx. 1-2 GB data volume per videoconference hour. Make sure you have enough data volume so that you don’t get throttled during the video conference. At “pass.telekom.de,” Telekom customers can also buy a daily flat rate for 6 euros. Other providers offer volume through their hotlines and apps.
Step 3: Setting up the camera
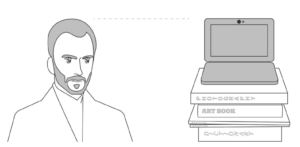
Place the computer on a stack of books so that the camera is a little higher than your head. Then position the camera in the direction of your eyes (with built-in laptop webcams, the monitor is often at right angles to the keyboard).
If available, be sure to use an external webcam. These provide a much better picture than the small integrated mini cameras in the laptop.
The camera should film you frontally, i.e. neither from below nor from above. You should not sit too far away, nor too close to the camera. Ideally, there should be a hand’s width of space above your head and your torso should be visible up to the base of your chest. Similar to an antique bust or newscaster.
Step 4: Light
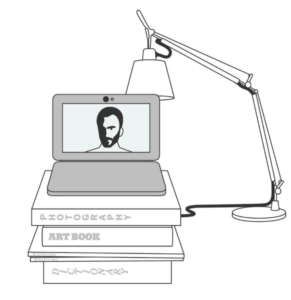
Place one or more lamps on the right or left side behind the computer. Attention: If the videoconference takes place in the evening when it is dark, lighting is especially important. The more light, the better. Our human eye quickly adapts to darkness. Cameras can’t do that. Darkness creates “image noise” (i.e. many interfering pixels appear).
Next, place a white sheet of paper or tablecloth on the table where you are sitting. This creates beautiful reflections from which your face will look brighter and friendlier.
Step 5: Clay
The sound is even more important than the picture. The sound quality of the built-in microphones on many computers is unfortunately often very poor. You therefore need a headset – also to minimize echo effects, room noise and interference from neighboring children, street noise and barking dogs.
There are many simple headsets that can connect directly to your computer via USB. They are often recognized directly by your PC. Also ask your
children or neighbors in case you don’t have one. You can also use the headphones of your cell phone and plug them into your laptop. Wireless Bluetooth headsets that you use to make calls on your cell phone are also a possibility.
Step 6: Smartphone as an alternative to the laptop
If you don’t have a webcam or a headset for your computer, you can use your cell phone. This often has a much better camera and almost always includes a matching headset.
To set up and test your picture in advance, simply use the normal “Camera” app on your smartphone in “Selfie Mode”.
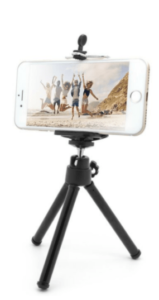
You can bring your phone to the right height just like the computer with the help of books. If you do not have a cell phone tripod from the last
vacation, punch and paperweight can keep the cell phone correct position.
Please always place your phone horizontally (i.e. across, not upright) to enable a 16:9 wide image.
Download the appropriate video conferencing app (ask the organizer which one to use) from the respective app store.
Charge your phone’s battery before the conference starts so you don’t go offline in the middle of it.
You can’t share PowerPoint presentations or anything like that on your phone. If that is necessary you, join the video conference also with your laptop.
(But then turn off the microphone, camera and sound there to avoid feedback and echoes).
3… 2… 1…

Ready for the show? – A little powder or makeup – et voilà!

Still remember:
Switch your cell phone, home phone, and (if possible) home doorbell to “silent” before starting. Pause washing machine, dishwasher and the like.
Disable (if possible) all system sounds and notifications in the system settings of your PC. Turn off all programs on the PC that you do not need. Close all other browser windows. If your computer has been running for many days, give it a restart.
Inform your family or roommates to be quiet so no undesirable situations arise. Ask them not to use Netflix, create their own
video conference or use YouTube during the live stream so you can use the full capacity of the WiFi.